


How to keep a figure on the same page as its caption in Microsoft Word
Quick Reference
Use Keep With Next to keep one paragraph on the same page as the next paragraph.
Use a Frame to group paragraphs that need to "float".
This page describes several ways to keep a figure, photograph, clipart, graphic, table or other element on the same page as its title or caption.
Click on the best match from the following list ("figure" here means anything except a table):
Figures
Case 1. Figure is a full page width (or nearly a full page width. Title is above the figure.
Case 2. Figure is a full page width (or nearly a full page width). Caption is below the figure.
Tables
Case 1. Figure is a full page width (or nearly a full page width). Title is above the figure.
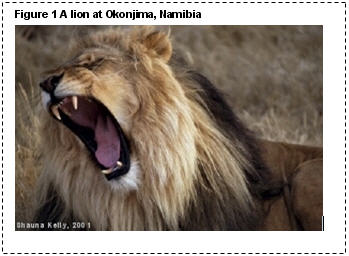
Case 1: Title is above the picture, and is the full width of the page.
- Make sure the figure is in-line (not floating).
- Make sure the figure is not selected. To do that, ensure there is an empty paragraph above the figure. Click in the empty paragraph, ready to type some text.
- Insert the caption. To do that:
- In Word 2000 and earlier: Insert > Caption
- In Word 2002 and Word 2003: Insert > Reference > Caption
- In Word 2007 and Word 2010: References > Insert Caption
Word will automatically insert the title in Caption style.
- Now, make sure the title will stay on the same page as the figure. We can do that by modifying the Caption style to "Keep with next". To do that:
- Open the Modify Style dialog box. For information on how to do that, see How to modify styles in Microsoft Word
- In the Modify Style dialog box, do Format > Paragraph. On the Line and Page Breaks tab, tick "Keep with next".
That will ensure that all captions you insert will stay on the same page as the following paragraph.
- Note: Make sure that you don't leave an empty paragraph between the title and the figure.
Case 2. Figure is a full page width (or nearly a full page width). Caption is below the figure.
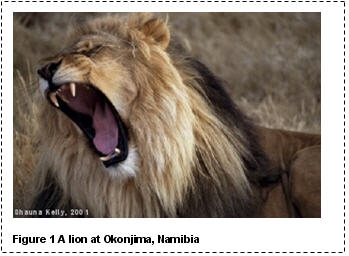
Case 2: Caption is below the picture and is the full width of the page.
- Make sure the figure is in-line (not floating).
- Make sure the figure is not selected. To do that, ensure there is an empty paragraph above the figure. Click in the empty paragraph, ready to type some text.
- Insert the caption. To do that:
- In Word 2000 and earlier: Insert > Caption
- In Word 2002 and Word 2003: Insert > Reference > Caption
- In Word 2007 and Word 2010: References > Insert Caption
Word will automatically insert the title in Caption style.
- Now, tell Word to keep this paragraph on the same page as the next paragraph. To do that, click your figure. Then:
- In Word 2003 and earlier: Format > Paragraph. On the Line and Page Breaks tab, tick "Keep with next".
- In Word 2007 or Word 2010: On the Home tab, in the Paragraphs group, click the dialog launcher at the bottom right corner of the Paragraphs group to display the Paragraph dialog box. On the Line and Page Breaks tab, tick "Keep with next".
That will ensure that the paragraph containing the figure is always on the same page as the following paragraph (which holds your caption).
However, that will only work for this figure. If you have more than one figure in your document, each with its own caption, the most efficient way is to use a style especially for your figures. Word does not have an appropriate one built-in, so create a custom style. Modify your custom style so that (a) Line spacing is set to Single and (b) Paragraph format is set to Keep With Next.
Case 3. Text has to wrap around the figure. Title is above the figure, or, caption is below the figure.
There are three ways to wrap text around a figure and its caption. Which is appropriate depends on what version of Word you have.
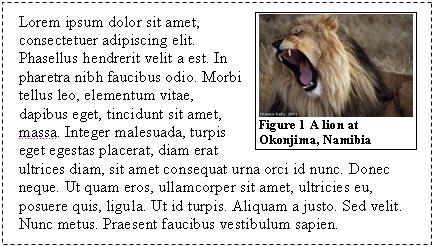
Case 3: Text wraps around the picture.
Option 1: Use a Text Box
In this option, we put the image and its caption in a Text Box. A Text Box can keep the image and caption together, and the text can wrap around the Text Box.
This works for any version of Word. However… if you put a caption in a Text Box in Word 2003 and earlier versions, the caption will not appear in table of figures generated using Word's table of contents feature. That was changed for Word 2007.
So this method is not generally appropriate for Word 2003 or earlier versions. Some people think that using a Text Box is better than using a Frame, so this method may be preferred for Word 2007 and above.
- Make sure the figure is in-line (not floating).
- Make sure the title or caption is not in a text box. That is, it has to be ordinary text.
- Select both the figure and the title or caption.
- Insert the Text Box. To do that:
- In Word 2003 or earlier versions: click Insert > Text Box.
- In Word 2007 or Word 2010: on the Insert tab, click Text Box. At the bottom of the gallery, click Draw Text Box.
- Note: The Text Box will stay on the same page as the paragraph to which it is anchored. To see where the Text Box is anchored:
- In Word 2003 or before: Tools > Options > View. Tick the Object Anchors box.
- In Word 2007: click the round Office button and choose Word Options. In the menu, click Display. Then tick the "Object Anchors" box.
- In Word 2010: click the blue File button and choose Options. In the menu, click Display. Then tick the "Object Anchors" box.
Once you have turned on the display of anchors, click anywhere within the Text Box to see the anchor in the left margin.
Terminology trap!
Once upon a time, Microsoft invented the idea of a "Frame" in Word. It was designed to group objects so that text could float around them on the page.
More recently, the word "Frame" has acquired a different meaning. It's a kind of web page where some parts of the page remain static, and some parts change.
When Word introduced ways to save web pages from Word, it had to create a way to use the new web-kind of frame. Since Word 2000, Format > Frames refers to a web frame. What you need for your purpose is a good old-fashioned Word frame. You get a Word frame from the Forms toolbar.
Option 2: Use a Frame
In this option, we put the image and its caption in a Frame. A Frame will keep the image and the caption together, and the text can wrap around the Frame.
- Make sure the figure is in-line (not floating).
- Make sure the title or caption is not in a text box. That is, it has to be ordinary text.
- We want to insert a Frame. But we first have to display the Insert Frame tool. To do that:
- In Word 2003 and earlier versions: click View > Toolbars. Click the Forms toolbar. On the Forms toolbar, you'll find the Insert Frame button.
- In Word 2007 or Word 2010: customize the QAT (Quick Access Toolbar) to add the "Insert Frame" tool to the QAT.
- Select both the figure and the title or caption.
- Click the Insert Frame button. This creates a frame surrounding the figure and its title or caption. Click the frame's edge (so you see 8 little squares), then right-click and choose Format Frame to adjust the frame.
- Note: The frame will stay on the same page as the paragraph to which it is anchored. To see where the frame is anchored:
- In Word 2003 or before: Tools > Options > View. Tick the Object Anchors box.
- In Word 2007: click the round Office button and choose Word Options. In the menu, click Display. Then tick the "Object Anchors" box.
- In Word 2010: click the blue File button and choose Options. In the menu, click Display. Then tick the "Object Anchors" box.
Once you have turned on the display of anchors, click anywhere within the frame to see the anchor in the left margin.
Option 3: Use a wrapped Table
In Word 2002 or later, it is possible to put your image and its caption in a 1-column table and set text to wrap around the table. However, this method is not generally recommended.
If you wrap text around a table, then, under the hood, Word puts the table in a hidden Frame. So Option 2 uses a Frame; Option 3 effectively uses a Table and a Frame. Adding unnecessary complexity to a Word document is rarely a good thing.
Further, there is some evidence that wrapping tables is not a good idea at the best of times and that they're prone to misbehaving.
Case 4. A table is the full width of the page (or nearly a full page width). Title is above the figure.
- Ensure there is an empty paragraph above the table. Click in it, ready to type some text.
- Insert the caption. To do that:
- In Word 2000 and earlier: Insert > Caption
- In Word 2002 and Word 2003: Insert > Reference > Caption
- In Word 2007 and Word 2010: References > Insert Caption
Word will automatically insert the title in Caption style.
- Now, make sure the title will stay on the same page as the table. We can do that by modifying the Caption style to "Keep with next". To do that:
- Open the Modify Style dialog box. For information on how to do that, see How to modify styles in Microsoft Word
- In the Modify Style dialog box, do Format > Paragraph. On the Line and Page Breaks tab, tick "Keep with next".
That will ensure that all captions you insert will stay on the same page as the following paragraph.
- Note: Make sure that you don't leave an empty paragraph between the title and the figure.
Case 5. A table is the full width of the page (or nearly a full page width). Caption is below the figure.
- Your caption is going to be below your table. So you need to tell Word to keep the last row of the table on the same page as the next paragraph. To do that, click anywhere in the last row of the table. Then:
Word will keep the last paragraph of the table on the same page as the caption below it.
- In Word 2003 and earlier: Format > Paragraph. On the Line and Page Breaks tab, tick "Keep with next".
- In Word 2007 or Word 2010: On the Home tab, in the Paragraphs group, click the dialog launcher at the bottom right corner of the Paragraphs group to display the Paragraph dialog box. On the Line and Page Breaks tab, tick "Keep with next".
- If necessary, create an empty paragraph after the table. Click in that paragraph and insert your caption. To do that:
- In Word 2000 and earlier: Insert > Caption
- In Word 2002 and Word 2003: Insert > Reference > Caption
- In Word 2007 and Word 2010: References > Insert Caption
- Note: Make sure that you don't leave an empty paragraph between the table and the caption.
- Caution! If the last paragraph in a table is set to "Keep with next", and you add a new row to the end of the table, the new row will also be marked "Keep with next". If you add several more rows, eventually Word won't be able to cope. It can't keep everything on the one page. So it will break the table across the page. And it always seems to choose the most inconvenient place to break!
Acknowledgment
Thanks to Geneva Peterson of the internet who pointed out some typos in this article.